Colour Scanning
After building an initial body model from the CT scan, I began to think about what it might look like. I wanted to have the option of my skin colour so that meant a full body colour surface scan. I found three very different scanning methods thanks to the generosity of three different organisations. The results are described and compared here.
Einstar hand scanner
Hand scanners can be fiddly to use, not because they are technically complex but because, unlike a studio, you normally have to do everything yourself. Calibration, space prep, post processing. It is not that difficult to go through the instructions but it takes time.
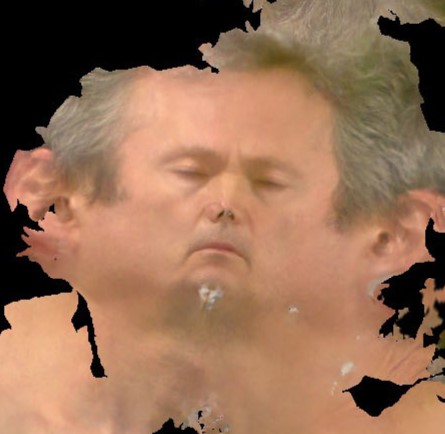
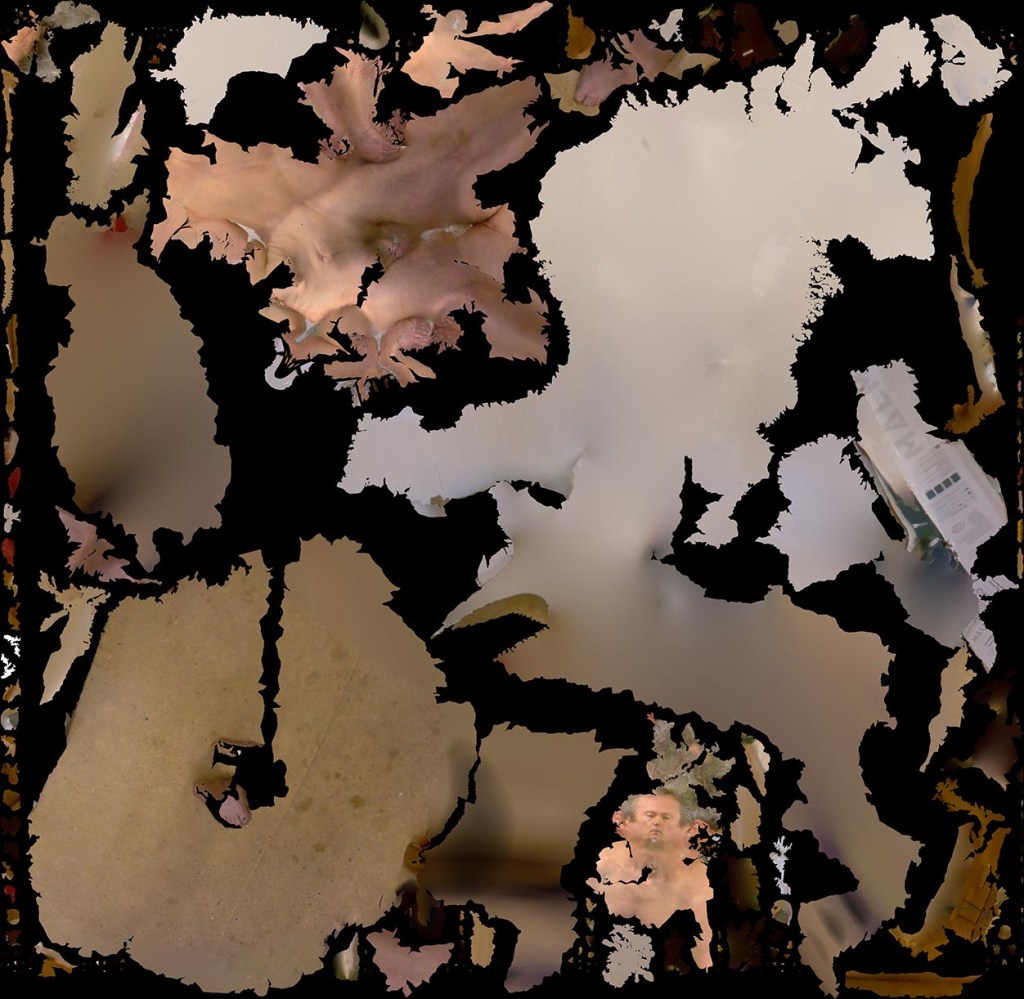
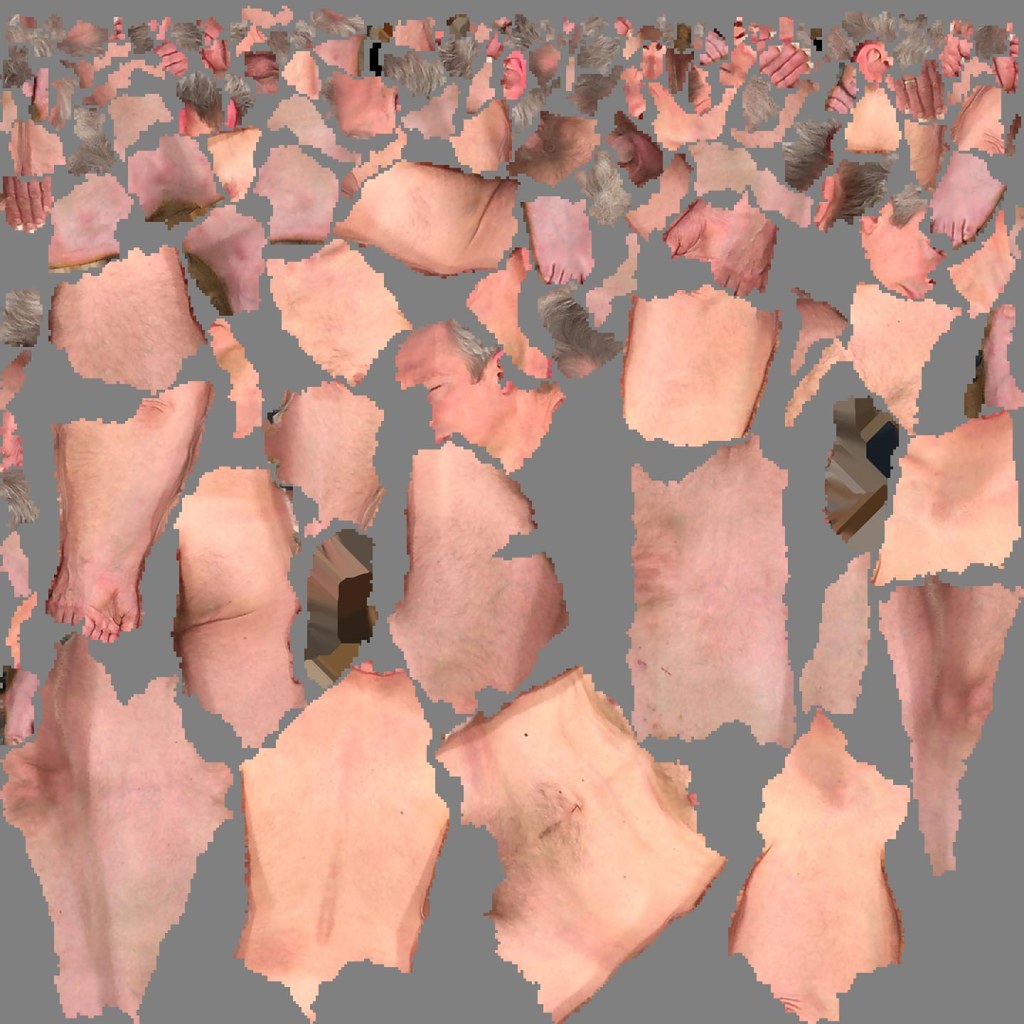
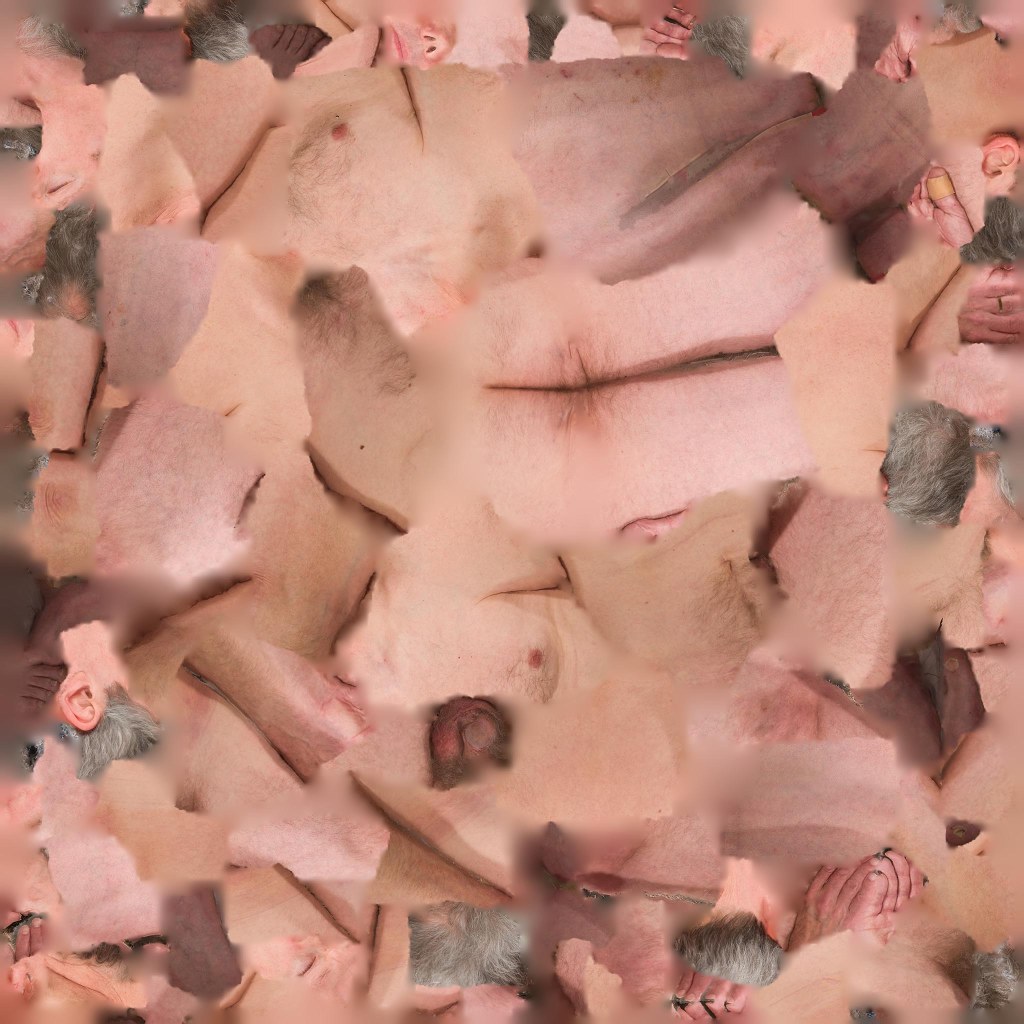
The other challenge is that hand scanning not an instant capture but can take several minutes. During that time a living subject cannot keep still (unless they are dead). This causes miss-alignments in the mesh and the texture which can be seen as seams and creases and are hard to clean up. The only way to lessen this is to scan quickly. This requires you to stand further away from the subject to get more in at once – for the Einstar the maximum WorkingDistance is about 1.4m. This means you need a larger space to scan or the scanner will pick up a lot of the background, and that means there is less space in the texture map for your subject. In Fig 1 you can see the initial result. Fig 2 is after remapping (a particularly useful Einstar software function for joining together fragments to make a more continuous texture). Fig 3 shows how much of the total texture was the body. The texture map resolution seems to be fixed at about 5k so everything has to squeeze into this.
Fig 4 is a detail of the final mesh. You can see the seams. The resolution of the body model was high – about 5 million triangles although you can’t see a lot of detail. Maybe slowing scanning would capture more detail, but then…
Thanks to Neil Smith for helping to make this possible.
The first scanner I tried was Shining 3D’s Einstar hand scanner, borrowed from our Storyfutures centre here at Royal Holloway.
https://www.einstar.com/


Target 3D volume capture
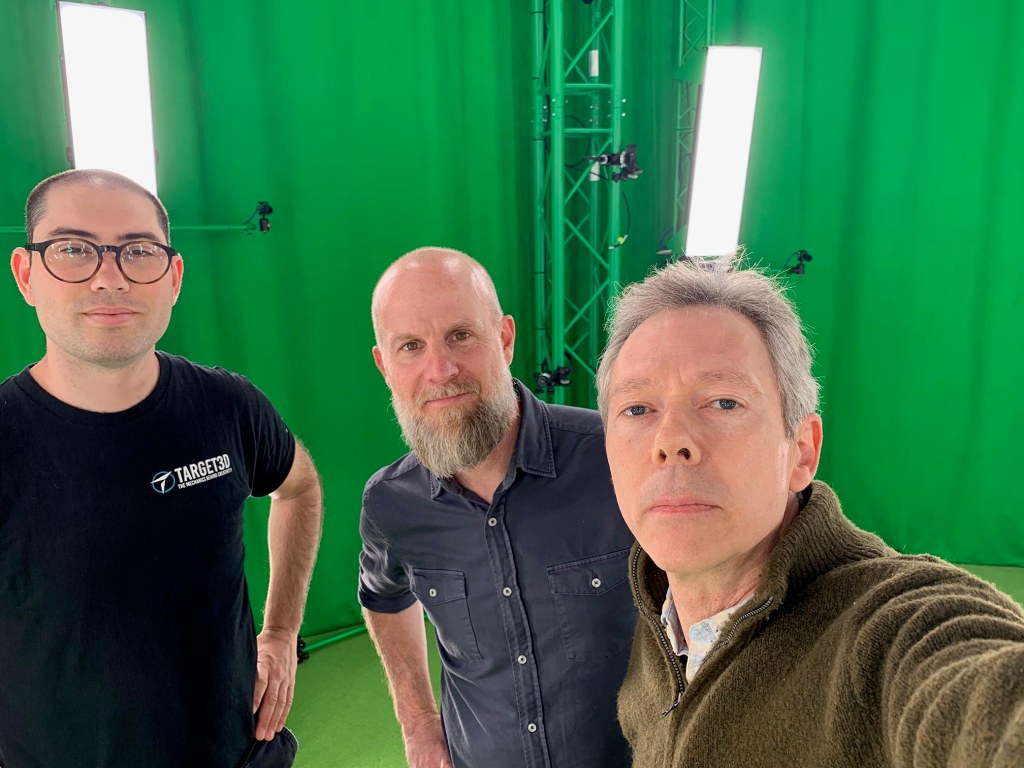
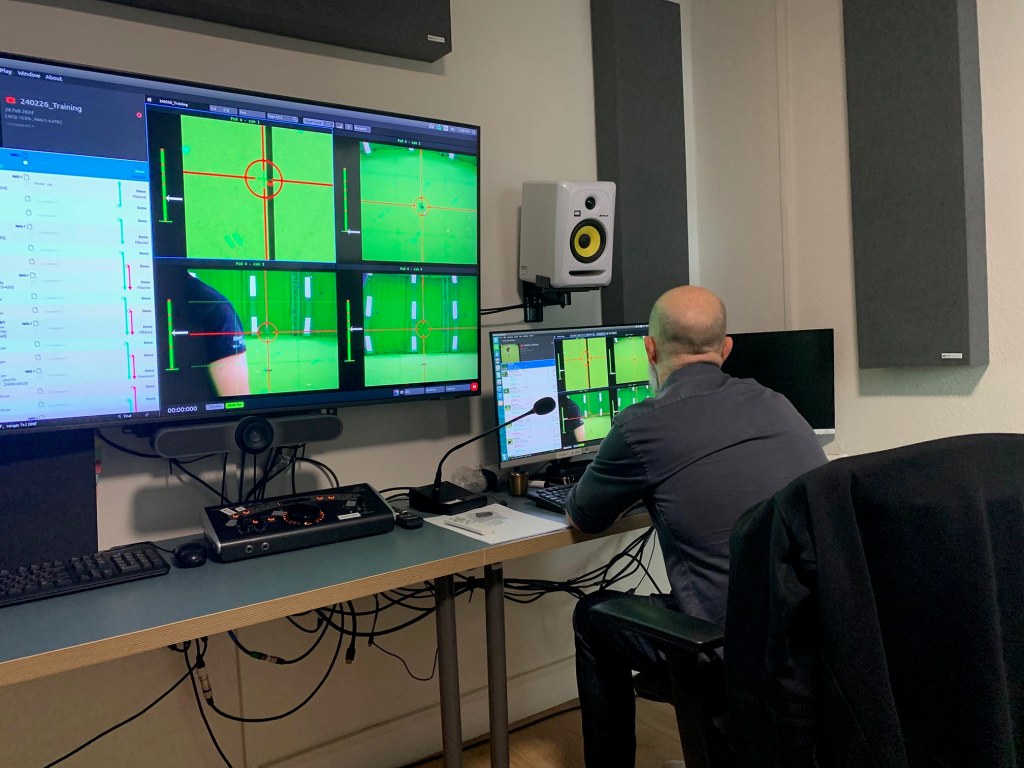
The capture volume is 9m in diameter of which the central 3m is the usable scanning area. There are 48 cameras arranged on the ‘poles’. They all have to be calibrated before the capture and then there can be lots of post-processing afterwards.
The volumetric capture rig is designed to capture action rather than stills. Normally this is limited to a minute or two, typical applications being fights or dance sequences for games, music video or other performance. Because it is capturing at 30fps, the model is lower resolution, only about 85k triangles. I held the pose for a few seconds and we chose an individual frame to output. Processing is in 4D Views.
Thanks to Allan, Ben and Aimo for making this afternoon so enjoyable.
I was kindly invited by Allan Rankin to try the volumetric scanner at Target 3D’s studio in Tower Hill. This is normally an expensive facility. I asked the head of R&D Benjamin Walbrook what the benefit could be to Target. His reply ‘skin tones’. I was the first nude subject they had tried scanning.
https://www.target3d.co.uk
Esper scanner at Central St Martins

The Esper rig is composed of 60 cameras. This produces a high resolution, instant still capture. The technician Fred had built this rig himself. He has has also built a commercial rig which has 200 cameras and outputs a mesh of 200 million triangles.
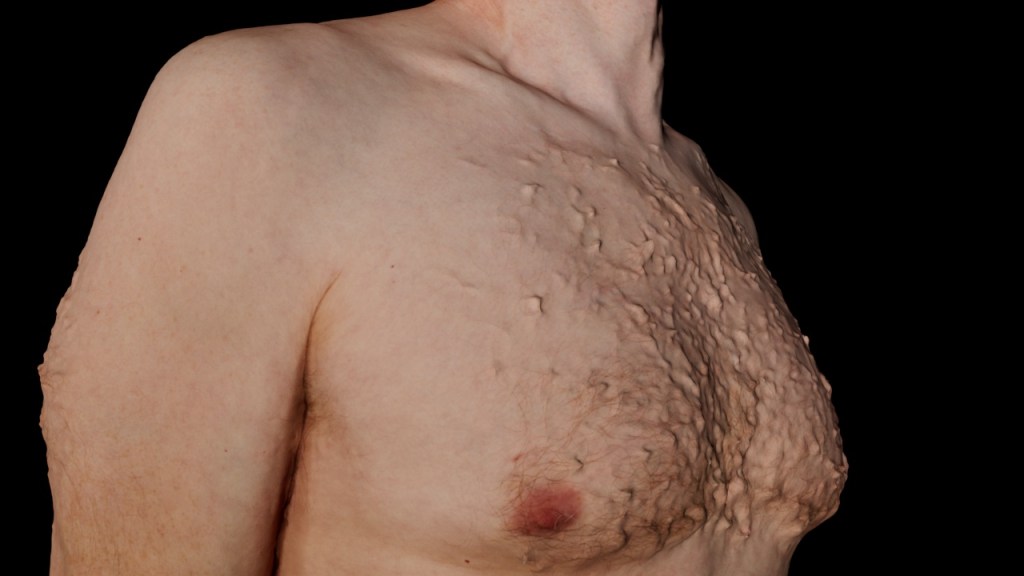
My part in the process was brief, like taking a snapshot. The final result produced a high resolution texture but interestingly the mesh has some artefacts. It is particularly noticeable in areas of body hair that it tries to resolve but are too thin.
Thanks to Kevin Rowe for making this possible. Thanks to Fred Woodward who so expertly performed the scanning.
A friend arranged for me to get a scan using the Esper rig facility at Central St Martins in Kings Cross.
Comparison
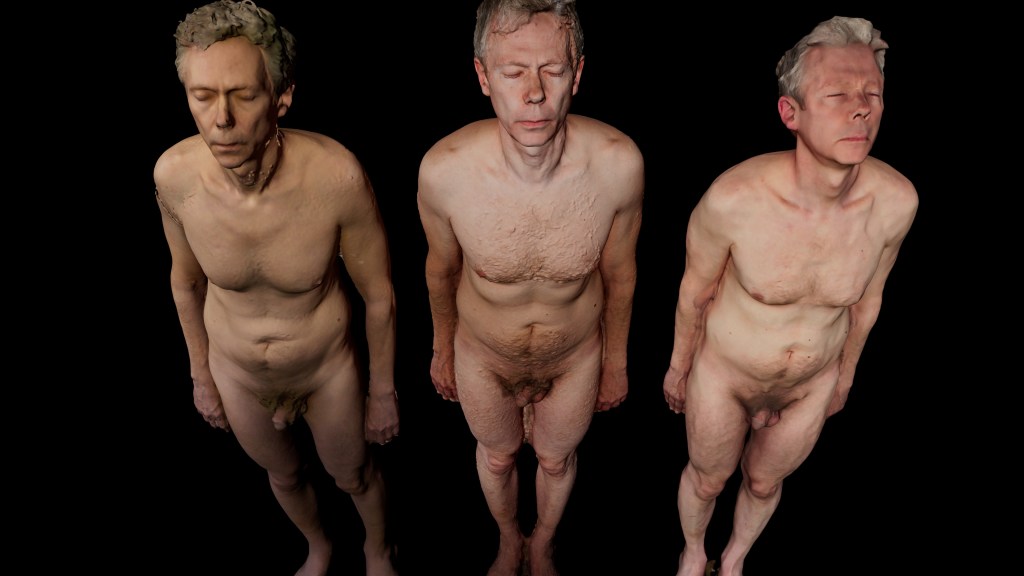
Here you can see the three results compared – Einstar hand scanner, the Esper rig, and the Target 3D volume capture.
| Einstar | Esper, CSM | Target 3D | |
| Texture res | 5k but mainly background, equivalent to about 10% of Esper I think | 8K | 2.8K, similar to Einstar but a bit softer |
| Mesh res | 5M (but low detail?) | 1M | 83k |
| Mesh quality | seams, worse after retop | noise on body hair | slightly lumpy |
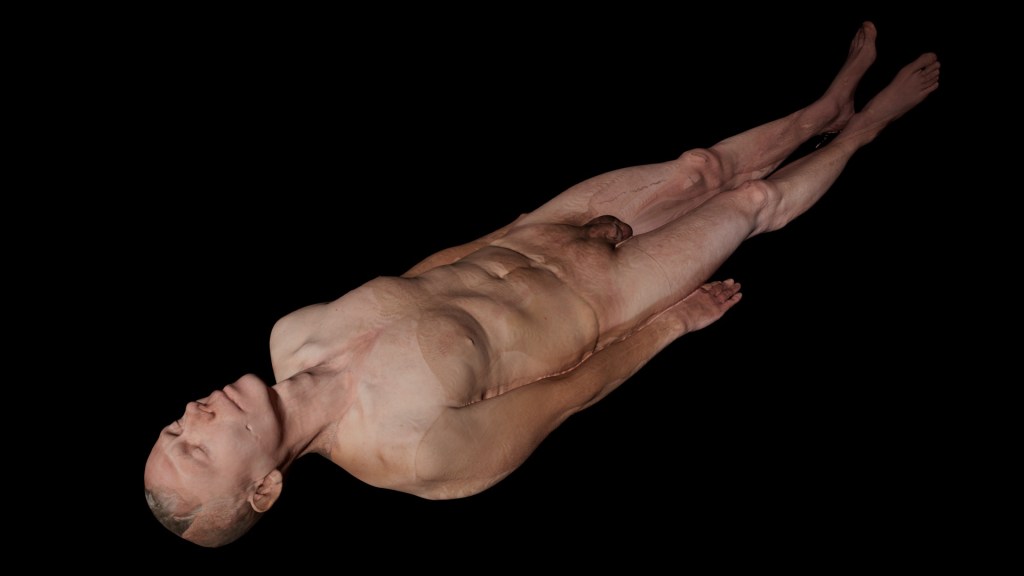
The most suitable for my purposes turned out to be the Esper scanner (if you are lucky enough to get access to one). The next stage is to transfer it onto the CT scan model. This is going to be a project in itself but you can see a rough hack below (the texture artefacts are due to the hack).