Wrapping
In early 2024 I managed to get a surface scan of my body which I could use as a texture map (see here). Texture mapping is probably the area of computer graphics which I have the least experience of. The process of transferring it onto the CT scan body for the fluid sim proved to be complicated…
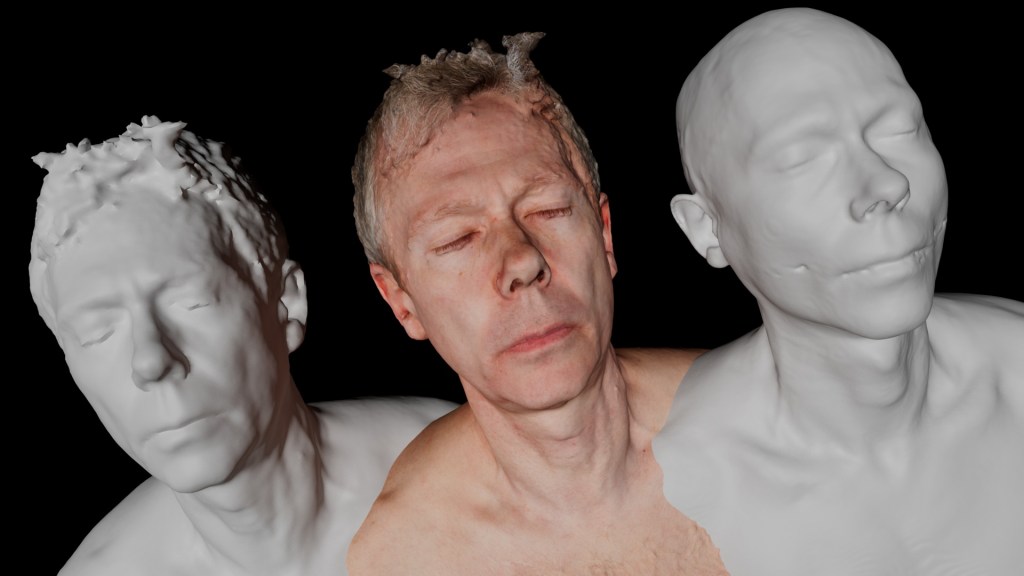
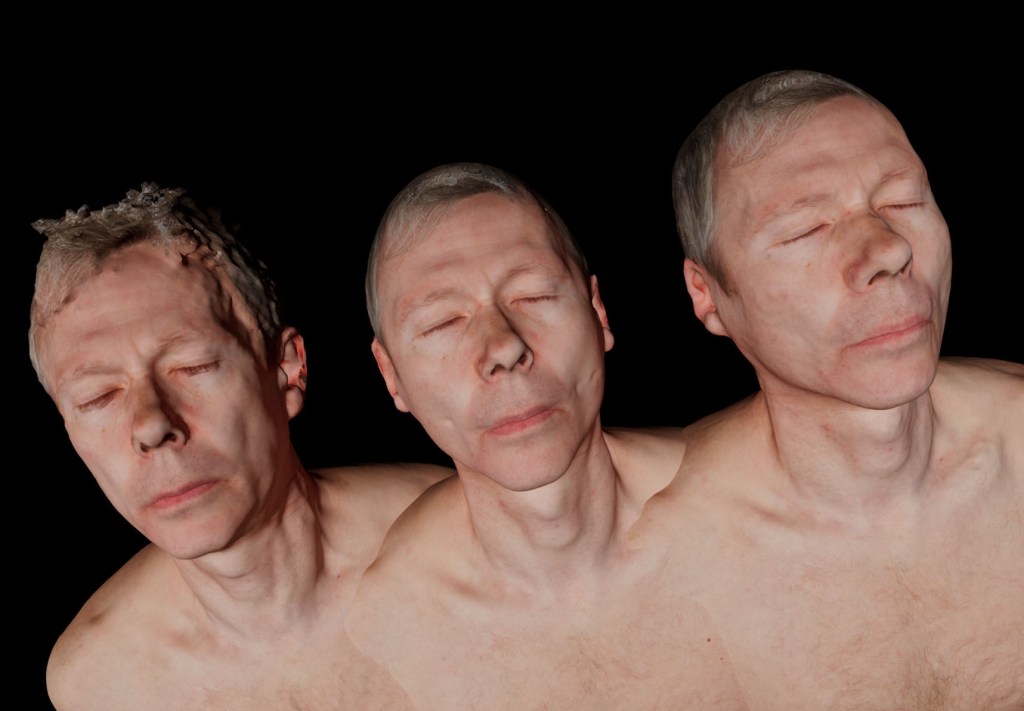
The body in the middle was the one scanned with the texture that I wanted to use. The body on the left is a lower resolution version I made – about 500k triangles. This was for speed but also notice that it removes a lot of the noise – always an issue with photogrammetry. The body on the right is from the CT scan, this version consisting of 2.2 million triangles. The problem – how to get the texture from the middle to the left and then to the right?
I didn’t know that when you optimise or reduce the size of a mesh you loose the original uv mapping coordinates, requiring the the texture map to be reapplied. I had never created uv mapping coordinates from scratch so I tried to take a short cut by using a cylindrical uv mapping. This required me to have to clean the texture map afterwards, which took about a day just to do roughly. In hindsight it would have been better to learn how to do it properly!
I first tried transferring the texture map directly to the CT model (using Wrap). The CT model is 2.2 million triangles. I loaded it into RealFlow and tried to sim it. The process took an eye-watering 25 days. Most of this was transferring the uv mapping from the model to the particles (the actual sim only took 6 hours). I questioned RealFlow support and learnt that the texturing side of the software had not been optimised. (I suspect this is one of those cases where one finds oneself using software for purposes that the developers had not expected). I decide to make a smaller 500k model instead…
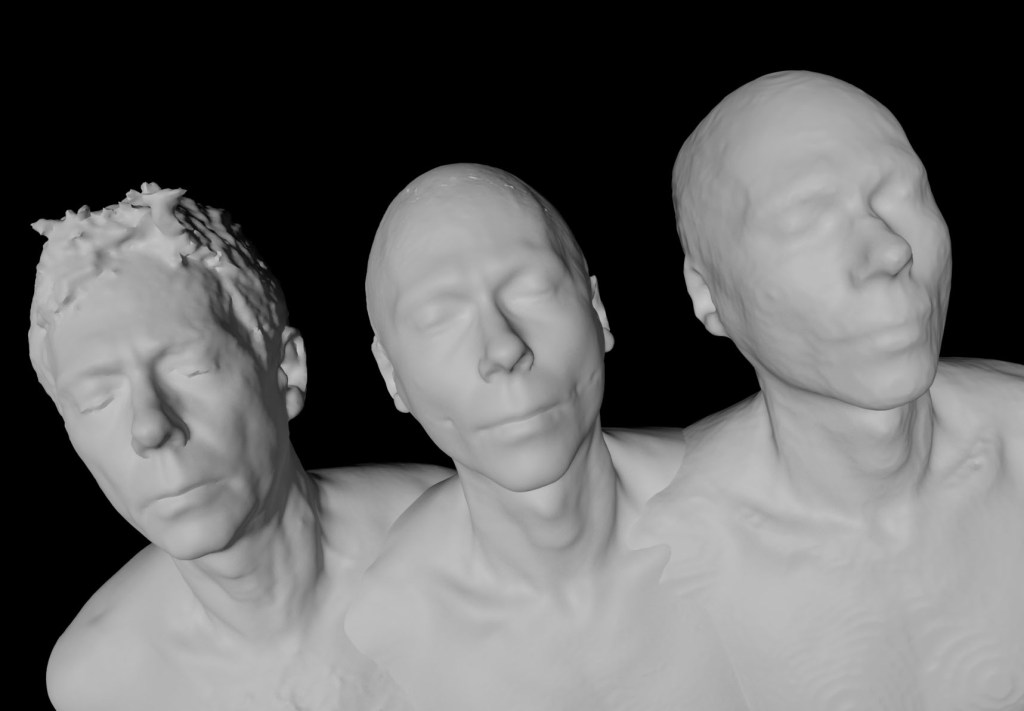
I loaded the smaller 500k model into RealFlow and ran the simulation which took 9 days. Above are the three stages of the model, without texture so you can compare the geometry. On the left is the surface scan model reduced to 500k, the middle is what it looks like when Wrap has deformed it to match the CT scan model and the right is how it look when it is simmed in RealFlow. RealFlow has to approximate the model using particles for the fluid sim – about 6 million in this case. Afterwards they are converted into meshes. You can see how much detail has been lost during this process. I am not sure if I can increase the accuracy anymore but the addition of the texture map should help the appearance.
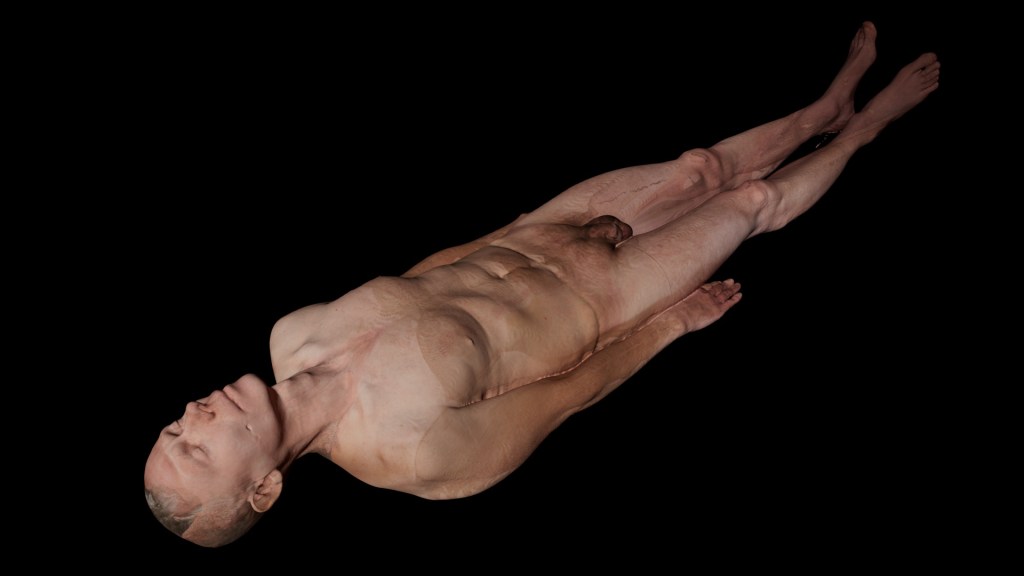
I rendered the final result in Cinema 4D. To approximate the decay of the tissues I graded the texture map to a dark greenish grey over the course of the 8 seconds of this test. This colouration was pure guesswork!
To transfer the texture map I used a piece of software called Wrap by Faceform. This proved very effective (and they are not even paying me to say that).
https://faceform.am/
ONE ———- My first task was to use Wrap to transfer the texture map from the 1 million triangle surface scan model to the smaller 500k triangle version. Wrap works by ‘wrapping’ one geometry (the ‘floating’) to another geometry (the ‘fixed’). This is mainly intended to be used to create morph targets by matching one mesh to multiple scanned meshes. It can also transfer the texture map to whatever uv mapping the ‘fixed’ geometry has. In this case it worked very well because these two models are essentially the same shape.
TWO ———- I had previously given the 500k model a simple cylindrical mapping. Above is the texture map that resulted when I transferred it. I had to clean it a lot because it is not really the right mapping to use. It does make a funny looking image though.

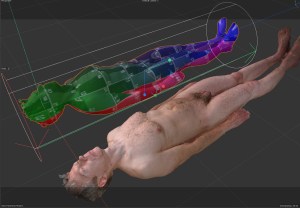
THREE ———- The next task was to use Wrap to deform the 500k scan model (seen textured) to match the CT scan model (yellow). If it wasn’t accurate enough the skeleton and organs might stick out. In fact, Wrap did a very good job.
The final result (similar to the image on the left but with the textures applied). The left image is the initial 500k model from the surface scan. The middle is the 500k model wrapped to the CT scan, the right is that model recreated in RealFlow with its particle based fluid simulator.
